Hever's Painting │ Portland Oregon
  • HOME
  • KITCHEN CABINET PAINTING
  • WOODWORK STAINING & REFINISHING
  • BLOG
  • CONTACT
  • Search
  • Menu

How to Paint a Room

June 4, 2021/0 Comments/in Uncategorized /by Nhu6DRew2@mGC9

How to Paint a Room: Secrets the Pros Won’t Tell You

Each painter has slightly different methods and preferences, but the pros all know the trade secrets.
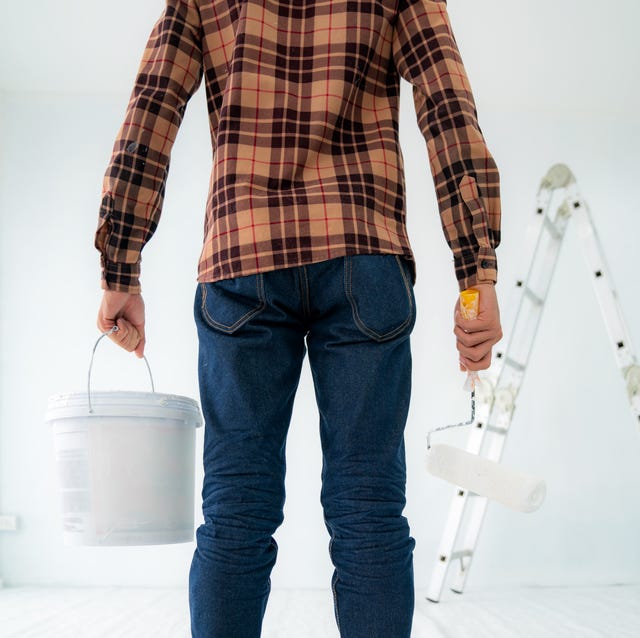
how to paint a room
PRASIT PHOTOGETTY IMAGES

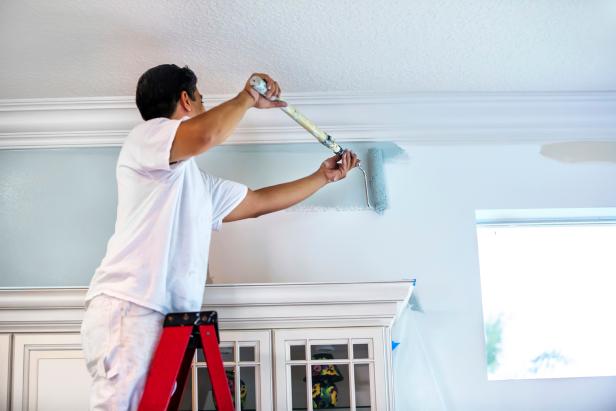
Professional painters know that time is money, so they routinely use trade secrets to help them paint faster, smarter and neater without sacrificing quality. We contacted several pro painters and ask them to share with us their favorite painting tips and techniques. Here, now, are their top 20 pro painting secrets:.

1Sand Away Flaws

paint a room   floor, ceiling, wood, hardwood,

GEORGIA NATIONAL GUARD/FLICKR

To apply a perfectly smooth coat of paint to walls, ceilings and woodwork, you must start with a perfectly smooth surface. One pro told us that Sander would be a more-fitting job title than Painter, since he spends so much time pushing sandpaper. Sanding with the appropriate abrasive paper helps level out spackling compound and drywall joint compound patches, flattens ridges around nail holes, and feathers out repairs to inconspicuously blend into the surrounding surface. Sanding also removes burrs and rough spots in painted wood trim, such as baseboard moldings, and window and door casings. And roughing up a glossy painted surface with fine-grit sandpaper allows the new paint coat to adhere more easily.

Use a sanding pole fitted with 220-grit sandpaper to sand the walls vertically from the baseboard up to the ceiling. Be sure to overlap each stroke slightly to ensure you don’t miss any spots. Then sand horizontally along the top of the baseboard molding, and along the tops of the walls at the ceiling. Don’t apply too much pressure on the sanding pole or its swiveling head might flip over and damage the wall. Plus, sandpaper tends to load up (clog) when you press down too hard.

To sand decorative woodwork, try using a sanding sponge, which gets into crevices and easily conforms to contours.
ADVERTISEMENT – CONTINUE READING BELOW
2Buy the Best Supplies
paint a room   footwear, plaster, material property, room, shoe, floor,

EZRA DYER

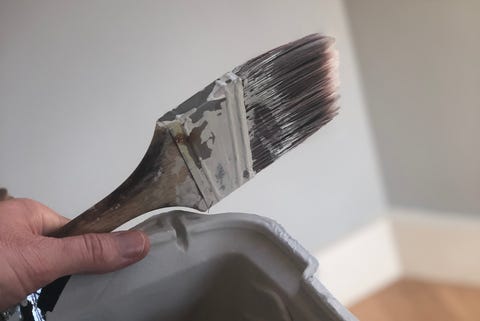
Don’t cheap out on paint and brushes. Cheap brushes are false economy. Purchase the best brushes you can afford, clean them well, and they’ll last you a lifetime. A $3 plastic brush is going make it look as if you smeared paint on the wall with a rake. And the bristles will fall out into the paint. Buy Wooster or Purdy paintbrushes, which cost a bit more than standard brushes, but are much more durable and apply paint very smoothly. A quality 2½-in.-wide angled sash brush is an excellent all-round paintbrush. It’s versatile and you can wash and reuse it until the bristles wear down to a nub.

It’s also important to buy the best paint you can afford. It’ll go on easy, offer the best coverage, and last a long time. Plus, you’ll be able to wash off grubby fingerprints without taking off the paint. And the whole painting job will go quicker and easier, and look better in the end.

3Cover Furniture
paint a room

TIMOTHY DAHL

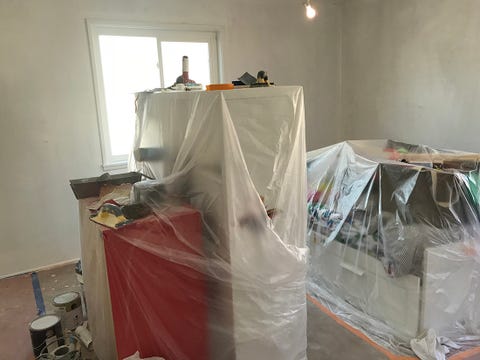
When painting a room, don’t bother lugging all the furniture out of the room. Instead, push all the furnishings to the center of the room and then cover it with plastic sheets that are taped at the bottom. This will protect the furniture from paint drips and splatters, and also from all the sanding dust.
4Use Tinted Primer
paint a room   stool, furniture, chair, table, plastic, ladder,

KEN DYCK/FLICKR

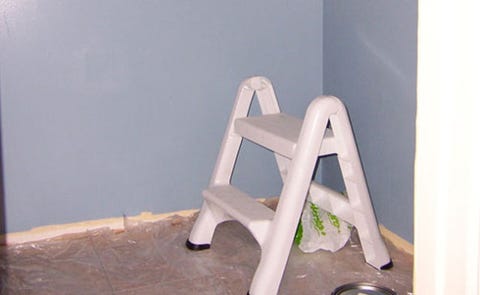
Before the pros paint walls, they fill holes and patch cracks with joint compound. But if you paint directly over the patched areas, the compound will suck the moisture out of the paint, giving it a flat, dull look; a problem called “flashing.” And those spots will look noticeably different than the rest of the wall. To avoid seeing patched areas through the finished topcoat of paint, it’s important to first prime the walls.

However, instead of using white primer

straight from the can, pros tint the primer with a little gray paint or with the color of the finish paint. Tinted primer does a better job of concealing patched areas and covering up the old paint color. As a result, the finish paint coat will be more vibrant and may require fewer coats. This is especially true when painting over colors like red or orange, which could require three or more topcoats coats, if you don’t first apply a tinted primer.
5Press Tape With a Putty Knife
paint a room

123

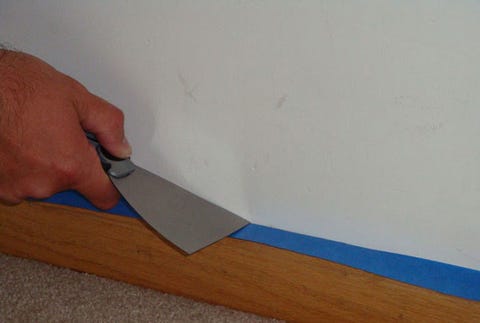
Painter’s tape is an indispensable part of every paint job, especially when masking off wood trim. But nothing is more discouraging than peeling off the tape only to discover that paint has bled through the tape and got all over trim. To avoid the pain-in-the-neck chore of scraping off the errant paint, do a thorough job of adhering the tape before you start painting.

Apply the tape to the wood trim, then run a putty knife over the tape to firmly press it down for a good seal. That’ll stop any paint bleeds. And be sure to use true painter’s tape, not masking tape. Masking tape leaves behind a sticky residue that’s hard to clean off. Plus, paint can cause masking tape to buckle and wrinkle, which lets paint seep beneath it. Painter’s tape can be left on for days (some types up to two weeks) and still peel off cleanly.
6Eliminate Brush and Lap Marks with Paint Extender
paint a room

123

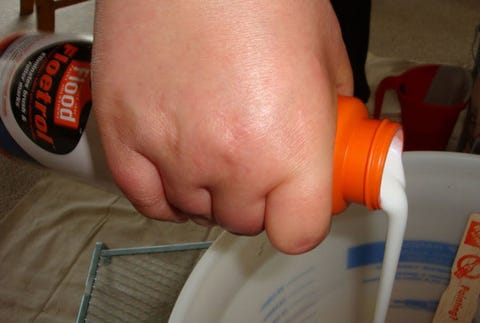
The telltale sign that a room has been painted by a novice DIYer, not a pro, is that there are visible lap marks in the finished paint coat. The secret to a finish that’s free of noticeable lap marks and brush strokes is mixing a paint extender (a.k.a.: paint conditioner), such as Floetrol, into the paint. This does two things: 1) It slows down the paint’s drying time, giving you more time to paint over just-painted areas without getting ugly lap marks, which happens when you apply fresh paint to dried paint. 2) Paint extender levels out the paint, virtually eliminating brushstrokes. Pros use extenders when painting drywall, woodwork, cabinets, and doors. Read the can’s label to determine how much extender to add to your paint, but it’s typically 8 oz. of extender per one gallon of paint. If the paint is especially thick, or if you’re painting in very cold weather, more extender can be added, up to about 16 oz.
7Scrape a Ridge in Textured Ceilings
paint a room

123

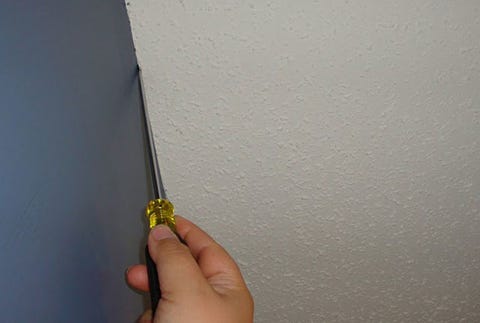
When painting along the top of a wall in a room with a textured ceiling, it’s almost impossible not to get paint on the ceiling bumps. Pros have a simple solution: Run the tip of a slotted screwdriver around the perimeter of the ceiling, scraping off a little bit of the texture. The screwdriver creates a tiny ridge in the ceiling, which the tips of your paint bristles naturally go into it. Now, you can cut in around the ceiling without getting paint onto the ceiling. And you’ll never even notice the missing texture.
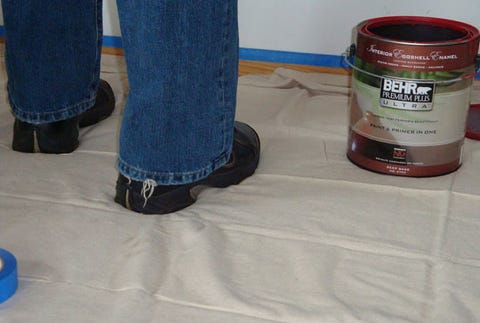
8Use Canvas Drop Cloths
Floor, Joint, Jeans, Leg, Footwear, Flooring, Design, Material property, Ankle, Textile,

Professional painters don’t use old bed sheets as drop cloths, and neither should you. Thin sheets won’t stop splatters and spills from seeping through to your flooring. And don’t use plastic sheeting either. While plastic does contain spills, the paint stays wet for way too long time. And if you step in wet paint, you’ll end up tracking it throughout the house. Plus, wet paint on slick plastic becomes very slippery.

Use what the pros use—canvas drop cloths. They’re more expensive, but canvas isn’t slippery, it absorbs splatters, and it’s durable enough to last a lifetime. And unless you’re painting a ceiling, you don’t need a jumbo-sized drop cloth to fill the entire room. A canvas cloth that’s just a few feet wide and runs the length of the wall is ideal for protecting the floor.

9Finish One Wall Before Starting Another
paint a room   pink, red, wall, room, line, magenta, material property, plaster, wood, interior design,

123

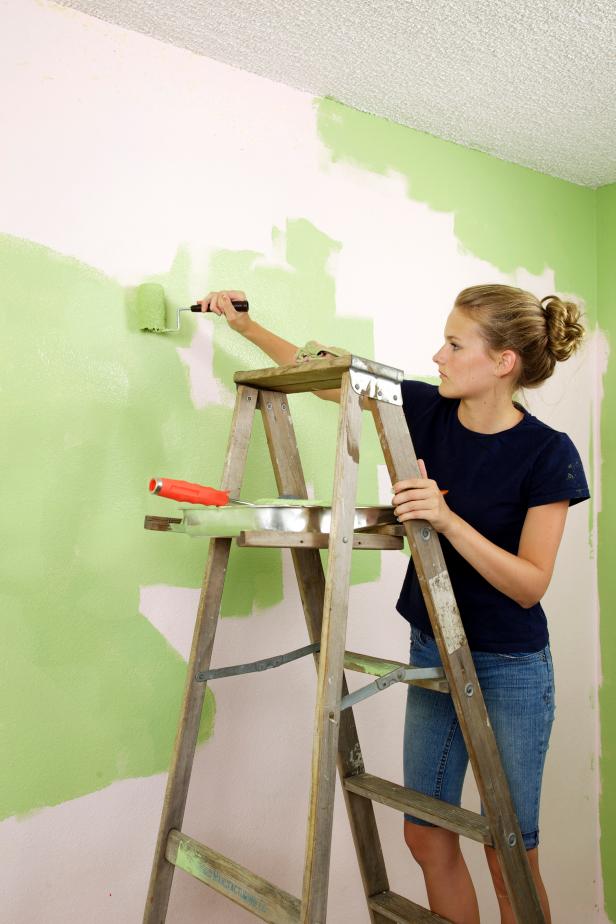
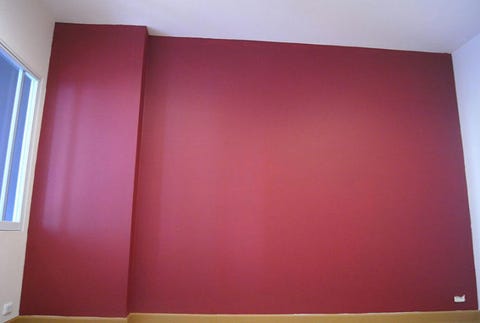
Most DIY painters cut in all the room corners, and then go back and roll paint onto the walls, but that’s not the correct way to paint a room. Pros get a seamless look by cutting in one wall, and then immediately rolling on the paint before the cut-in sections dry. This allows the brushed and the rolled sections to blend together beautifully.

Also, cover your paint bucket, tray, or container with a damp towel when switching between brushing and rolling; that’ll keep your paint and tools from drying out when not in use.
10Scrape (Don’t Tape) Windows
paint a room

123

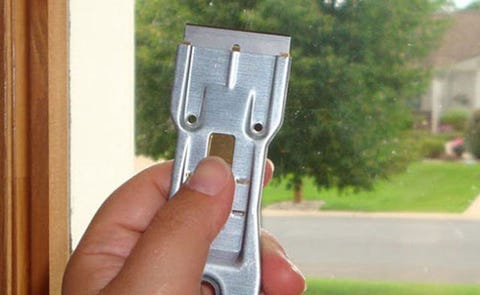
When painting windows, don’t bother taping around the window frame and grill. That takes too long time and paint usually ends up on the glass anyway. Try this pro trick instead: As you paint the window, let a little paint lap onto the glass. Once it’s dry, simply scrape it off with a razor scraper. Just be careful not to slice through the paint bond between the wood and glass. Otherwise, moisture can seep into the wood and cause rot.

11Box Paint for Consistent Color
paint a room

EZRA DYER

When you buy two or more cans of the same color paint, guess what? They’re almost never the same exact color. That’s because paint color varies very slightly between cans. And that small difference can be glaringly obvious if you open a new gallon halfway through a wall. To ensure color consistency from start to finish, pros mix their cans of paint into a five-gallon bucket, a technique known as “boxing” paint. Then you can paint directly out of the larger bucket, which eliminates the need to pour paint into a roller tray.

Some pros then paint directly out of the bucket. This eliminates the need to pour paint into a roller tray, though the heavy bucket is harder to move.
12Buy an Extra Bucket or Two
paint a room   dairy, food, plant milk,

EZRA DYER

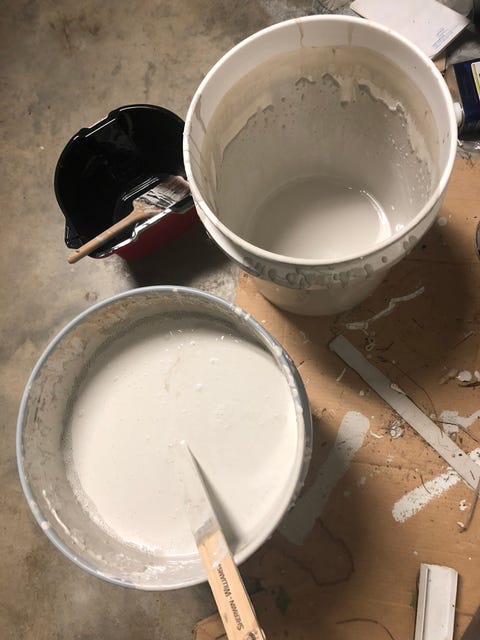
It’s smart to have a couple of clean, empty buckets
on hand when painting because freshly shaken paint doesn’t stay freshly shaken for very long. And you can’t bring settled paint back to life with a stir stick alone. So, you must pour paint back and forth between two buckets until you’ve mixed in the solids that have collected at the bottom of each can. That’s the best way, and really the only way, to ensure your paint is properly and thoroughly mixed. And if you have paint in several different cans, mix those too to ensure color uniformity.
13Wash Roller Covers
Hand, Finger, Gas,

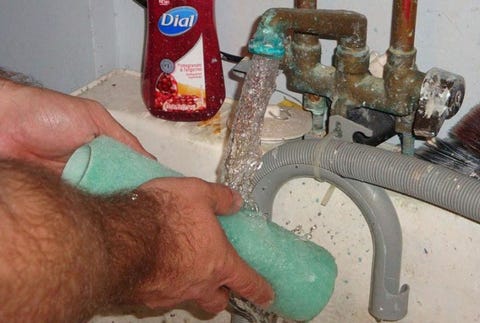
Odd as it may sound, it’s important to wash brand-new paint-roller covers before using them to spread paint. Pre-washing gets rid of loose bits of fuzz that inevitably come off once you start painting. Wash the covers with water and a little bit of liquid soap, then run your hands up and down the covers to pull off any loose fibers, a practice called preconditioning. And you can start using the roller covers right away; you don’t have to wait for them to dry.
14Take Off Those Electirc Plates
paint a room

EZRA DYER

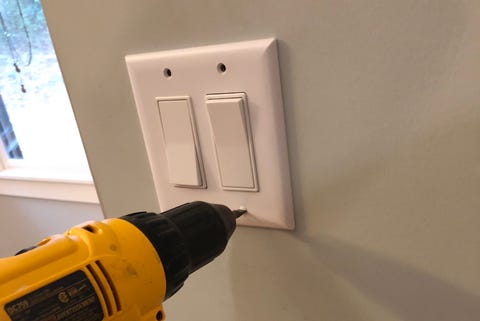
This is a no-brainer. Instead of laboriously masking off or cutting around electrical outlet plates and switch plates, grab your screwdriver and take them off. Then you’ll be able to quickly and easily paint around each electrical device without making a mess. Just be sure to keep track of all the screws, so you can put the cover plates back on once the paint dries.
15Give Yourself a Good Set
paint a room   glass, material property, door, room, architecture, floor, metal,

EZRA DYER

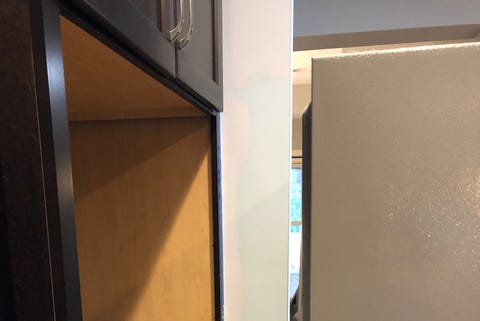
In painter lingo, a bad set is when you’re in a physically bad position while painting. For example, maybe your ladder isn’t quite close enough, or you’re in an awkward spot with your brush. The good news is that most bad sets can be are avoided. Just climb down and move the ladder. Sure, it’s annoying, but it’s not as annoying as falling into your paint bucket because you were hanging off your ladder like an America’s Cup crew member. And sometimes a bad set can be resolved by moving an obstacle. If the refrigerator is forcing you into a tough painting position, stop and roll it out of the way.
16Light It Up
paint a room   room, suitcase, floor, furniture, interior design, baggage, flooring, window, house,

EZRA DYER

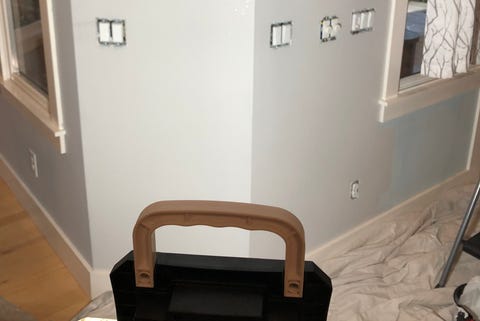
Here’s another painter term for you: holiday. That’s when you miss a spot without realizing it. It’s easy to do, especially with similar colors or rooms with bad lighting. So, get yourself a good bright work light and use it to check your work, either as you go or when you finish a section. Holidays typically occur around the edges of a room, where you used a brush instead of a roller. Holidays are easy to fix when you’re still working, but much more annoying after you’ve cleaned up and put everything away.
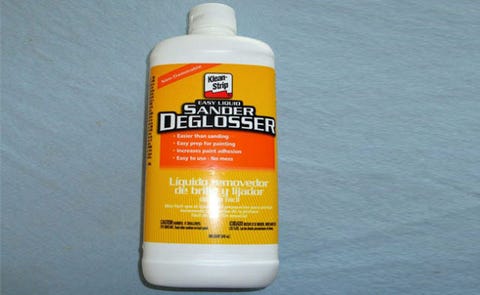
17Clean Dirty Walls With Degreaser
paint a room   product, wood glue, room, liquid, drain cleaner, fluid,

Paint won’t bond to greasy, dirty, dusty surfaces, such as kitchen walls above a stove, mudrooms where kids kick off their muddy boots, or areas around light switches that get swatted by dirty hands. In those cases, use a degreaser to clean the surface prior to painting. Degreasers, which are also called, deglossers, cut through grease and grime to allow better paint adhesion. Be sure to read the label and follow directions because this stuff is potent. And wear rubber gloves and eye protection.
18Start With a Loaded Brush
paint a room   royal icing, dairy, food, marshmallow creme, carmine,

EZRA DYER

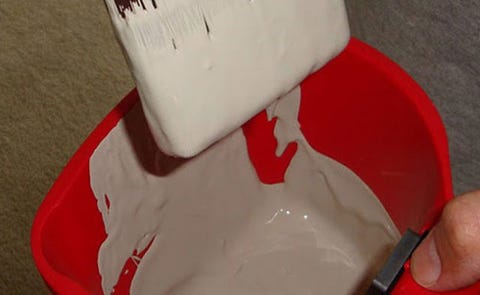
Pros take a “load and go” approach to painting. They load the bottom 1½ in. of their brush bristles with paint and then tap each side of the brush against the inside of the can. That knocks off heavy drips and prepares the brush for painting. By contrast, homeowners often take a “load and dump” approach: They dip the brush into the paint, then drag the loaded bristles along the sides of the container, wiping off most of the paint. The result is a brush that’s too dry and has too little paint.
19Push Paint to Avoid Runs
paint a room   arm, facial hair, water, hand, joint, elbow, beard, muscle,

AUST DEFENSE FORCE/FLICKR

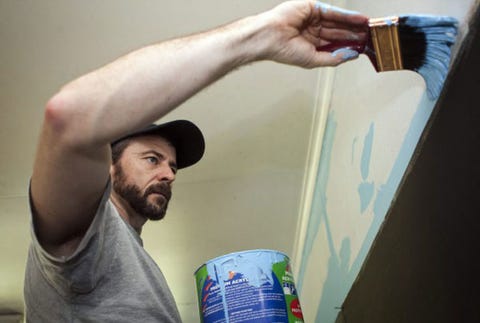
When your brush is loaded with paint, it’s easy to create drips and runs by applying too much paint in room corners or along wood trim. To avoid those issues, start brushing about a 1/2 inch away from the cut-in area. As the brush unloads paint, move closer and slowly drag the brush along the trim or corner. Let the bristles gently push the paint against the cut-in area where the walls meet. You may have to do this a couple of times to get complete coverage, but it’ll avoid excess paint collecting along woodwork and in corners.
20Bag It Up
paint a room   material property, textile, beige, bag,

EZRA DYER

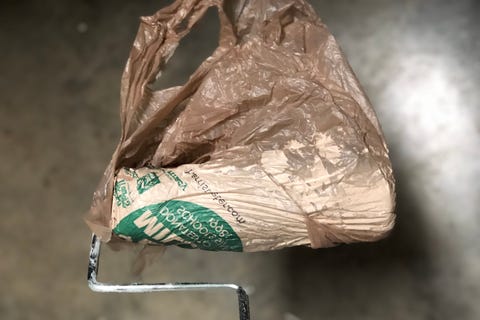
When you’re ready to quit for the day, but haven’t finished painting, leave the roller cover on the roller frame, then soak the cover in paint. Wrap the cover in a plastic bag to create an airtight seal. That’ll keep the roller cover fresh until you return to painting the next day. If you can’t return to painting for several days, pull the roller cover off the frame and toss it out. Then use a new roller cover the next time.

As for your brushes, rinse them clean with warm, soapy water, if using latex paint, which is water-based. Use paint thinner to clean off oil-based paint. Then rake the bristles out straight with a brush comb and then slip the brushes back into their original covers or wrap them in newspaper.

http://heverspainting.com/wp-content/uploads/2021/04/hevers-fine-touch-painting-logo-1.png 0 0 Nhu6DRew2@mGC9 http://heverspainting.com/wp-content/uploads/2021/04/hevers-fine-touch-painting-logo-1.png Nhu6DRew2@mGC92021-06-04 16:46:542021-06-04 16:46:54How to Paint a Room

The Top 10 Ways to Paint Like a Pro

June 4, 2021/0 Comments/in Uncategorized /by Nhu6DRew2@mGC9

The Top 10 Ways to Paint Like a Pro

For a professional-looking paint job, do what the experts do.
Wait for dry weather.
Humidity means drips and slow drying, so avoid painting on a rainy day. If you must paint when it’s humid, take your time — and take advantage of slow-drying paint to correct your errors before moving on to the next coat. But don’t overwork, or it will show when you’re finished.
Do a thorough visual inspection and prep.
Any cracked, flaking, or peeling areas need to be lightly sanded or scraped (and then thoroughly rinsed) before applying new primer and paint, because the weight of the new coat will pull the old paint loose. “You’ll just end up wasting your time and money if you don’t tackle that first,” says Tom Lee, Senior VP of Consumer Marketing for Behr. Greasy spots may also need a bit of washing with soap, followed by a rinse with clean water. Otherwise, give the walls a quick wipe-down with a damp cloth so that paint will have a clean, dust-free surface to stick to.
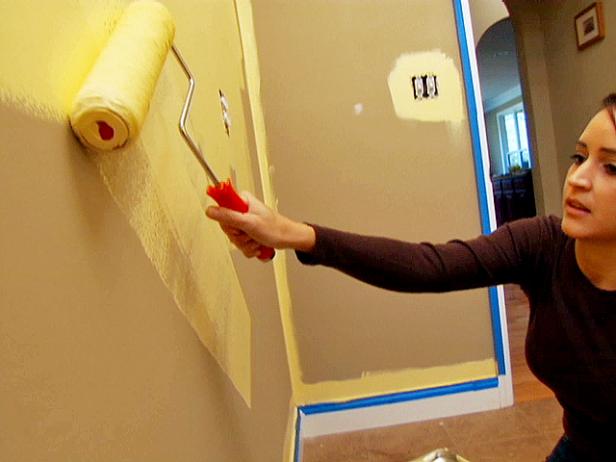
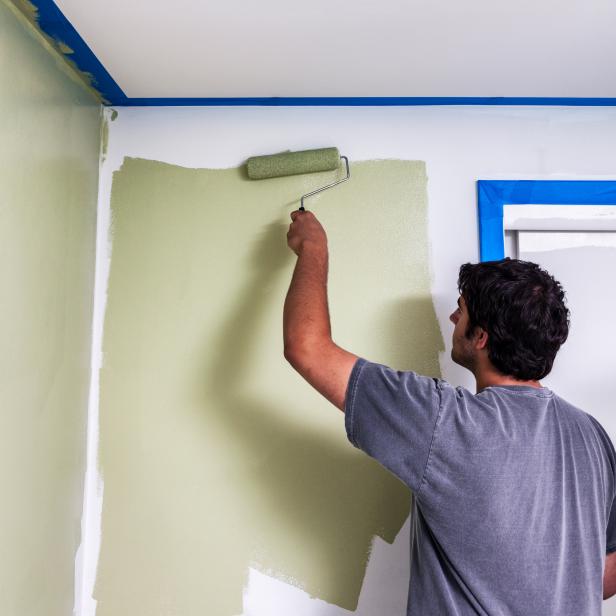
Rolling Yellow Paint on a Beige Wall
Buy high-quality brushes, roller covers, and painter’s tape.
If you’re splurging on great paint, you definitely don’t want to pinch pennies on the application. Good brushes and roller covers give excellent coverage so that you don’t waste time and paint on re-application, and high-end painter’s tape is the real deal when it comes to sealing out drips and blurs.
Know your nap.
The more texture your walls have, the thicker the nap you’ll want on your roller cover so that it can reach into crevices and give complete coverage. But if you go too thick, you might actually create texture where you don’t want it, so be prepared to give your salesperson details about what you’re painting.
Protect anything you don’t want painted.
You will never regret the time you spend covering floors, furniture, and hardware before you begin a paint project. Drop cloths are a must, and small plastic sandwich bags secured with tape are an easy way to protect doorknobs.
Remove light switch and outlet covers. 
If you’re impatient, you’ll be tempted to skip this five-minute step, but don’t.
Use primer.
Paint-and-primer combinations are fine if you already have a clean, smooth surface, but if there are any issues with the wall or it’s been more than eight years since you last painted, bite the bullet and go with a separate primer. If you need to cover an especially challenging surface (say, glass or high-gloss paint), use a bonding primer such as Benjamin Moore’s Insl-x Stix Waterborne Bonding Primer or KILZ Adhesion Interior & Exterior Bonding Primer.
Box your paint.
Get your salesperson to help you with a realistic estimate of how much paint you’ll really need so that you can buy it all at once. Then, instead of using one gallon at a time, combine all the paint into one large container and mix it thoroughly. This is known as “boxing” your paint, and it keeps your color consistent from beginning to end.
Let the roller do the work.
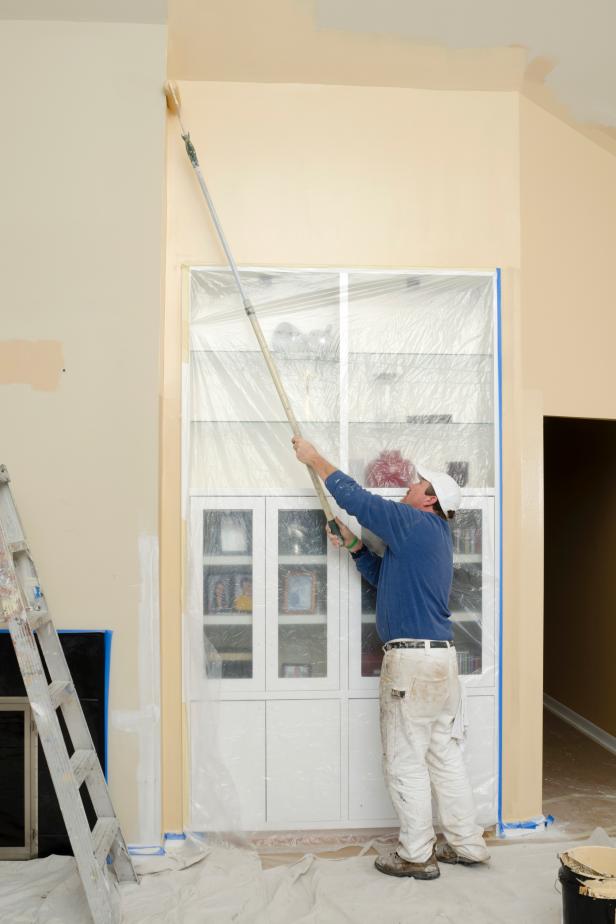
Today’s premium paints flow on easily, and you’ve already chosen a good roller cover (right?), so there’s no need to use much pressure. Be sure to use an extension pole so you can reach the maximum amount of area with the least effort — and without straining your back.
Paint from top to bottom.
After you’ve cut in your edges at the ceiling and baseboard using a brush, use your roller to apply paint from the ceiling downward. Amateurs often have telltale drips and spatters at the end of a paint job, but pros paint right over their mistakes as they work their way down the wall. Once an area starts to dry, it’s best to leave it alone. Going back over it can leave marks and color streaks in the paint’s surface.
15 Painting Mistakes to Avoid
If you want your paint job to be flawless, avoid these amateur moves.

Skipping prep time

“Lack of proper prep is usually the biggest difference between DIY and professional projects,” says Tom Lee, Senior VP of Consumer Marketing for Behr. “Homeowners understandably want to jump right into the project, because they’re excited to see their new color on their walls — it’s an emotional reaction. But keep in mind that professional painters spend the majority of their time on prep.” Make sure you’ve properly cleaned walls, scraped off peels and cracks, applied painter’s tape carefully, and allowed any patching compound to dry before you start.

Skimping on brushes and roller covers to save money

“You can have the best paint in the world and it won’t perform if you go cheap on the applicators,” Lee says. Good brushes and roller covers give better coverage and save you on paint in the long run — plus the brushes will last for years if you take care of them — so they’re worth the splurge.

Using masking tape instead of real painter’s tape

Pros spend the money for high-quality tape, and you should, too. Use a putty knife or mini scraper — not your finger — to remove air bubbles and seal the edges to prevent drips and ensure sharp lines.

Going without primer

Primer covers flaws in the surface and gives you a smooth, long-lasting finish. It’s fine to use paint-and-primer-in-one mixes if the old surface was previously painted, is in good shape, and has a flat (non-glossy) finish. But if you’re painting over a more difficult surface such as plaster, wood, concrete, glossy paint, or stained/porous drywall, use a stand-alone primer or a premium all-in-one mix specifically designed to cover unpainted surfaces.
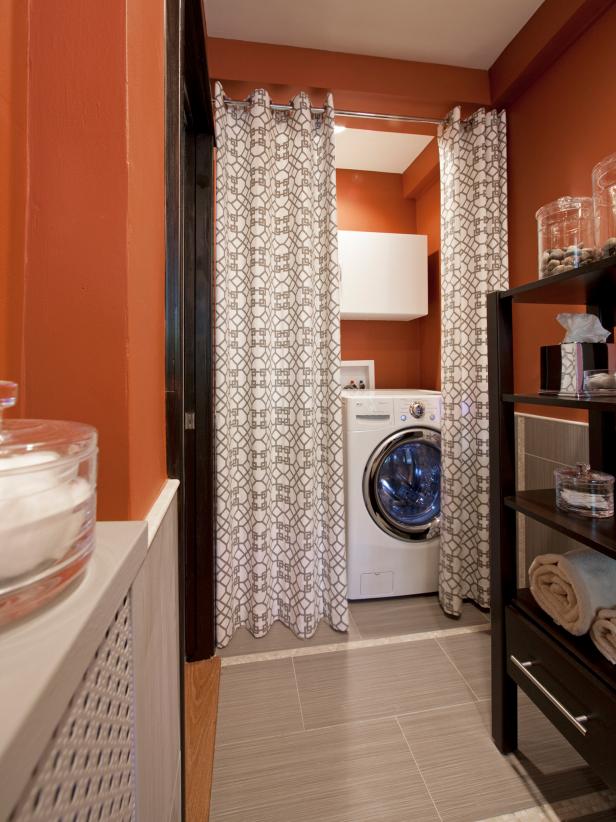
Bold Orange Laundry Room

Natalie Sheedy; Natalie Sheedy Interiors

Using flat paint in a high-traffic area

Washable satins or semi-glosses are a better choice for rough-and-tumble places like closets and laundry rooms, but you can also choose a durable premium matte finish such as Benjamin Moore’s Regal Classic Premium Interior Paint or Behr Marquee Interior Paint & Primer.

Which Paint to Use in What Room 02:22

Learn what type of paint you should use in every room.

Painting over high-gloss paint without sanding

New paint needs some texture to adhere to, so make sure to lightly scuff any shiny surfaces with sandpaper, followed by a rinse with clean water.
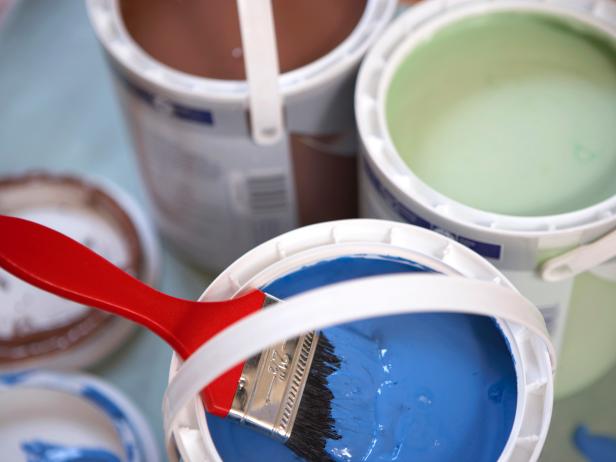
Bucket of Blue Paint

Plunging your brush too far into the paint

Dip it only a third of the way in — you’ll get enough paint on your brush without wasting or pushing the paint deep into the bristles, which is tough to clean.

Painting aimlessly

Always start near the ceiling and work your way down for the smoothest finish; that way you can catch drips as you work.

Painting over wallpaper with water-based paint

You can paint over wallpaper, but be sure to use oil-based primer first. Water-based paints and primers can reactivate the wallpaper glue and cause unsightly peeling.

Skipping cleanup

You’re tired at the end of the job, so you put the brushes in the garage and decide to deal with it later — bad idea! Protect your investment by washing those brushes thoroughly with water and dish detergent, wrapping them in airtight plastic wrap or aluminum foil, and storing them in their original packaging so that they hold their shape.

Paintbrushes and Applicators 02:28

Before you start painting, learn what type of brushes and rollers you should use.

NOW VIEWING

How to Prepare a Painting Kit

Before you begin a painting project, be prepared by putting together a “painting kit.”
INTERIOR PAINTINGINTERIORTOOLS
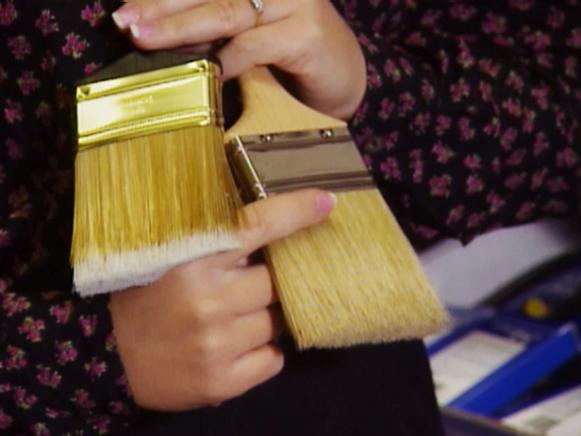
Two Different Types of Paint Brushes
  • A typical painting kit includes patching paste, a putty knife, a drop cloth, plastic gloves, paint thinner, primer and a paint can opener. Note: Do not open a paint can with a flathead screwdriver, as this can damage the lid.
  • Be sure to purchase plenty of painter’s masking tape, assorted paintbrushes and a paint roller and roller cover. It would also be helpful to add an extension bar to your kit. It will help you reach the ceiling and will allow you to stand away from the wall to prevent spatters of paint on your clothes.
  • The paint kit should include a paint pot and a roller tray with a disposable liner. If you plan to paint a large area, include a 5-gallon bucket with a screen grid for removing excess paint from the roller.
  • No paint kit would be complete without a multipurpose paint tool, which can be used to clean caulk, pull nails, clean roller covers, apply putty or glaze, scrape paint and drive nails. Finally, be sure the kit includes safety glasses to prevent paint spatters from getting in your eyes.
  • When selecting paintbrushes, choose nylon- or synthetic-bristle brushes for use with latex paint and natural-bristle brushes for oil-based paints, stains and varnishes. Paint-roller covers come in different naps and textures. Unless you plan to apply texture to the wall, use shorter naps for smooth surfaces and longer naps for textured surfaces.
  • Instead of dipping the paintbrush directly into the paint can, use a paint pot, which is wider than a standard paint can. When loading the brush, dip half the length of its bristles into the paint. Slap the brush against the side of the pot to remove excess paint, and remove the brush. Hold the brush up at an angle to hold the paint. As you apply the paint to the wall, the friction will draw paint from the brush.
  • Drill holes in the paint stick to help mix paint more thoroughly. To keep paint from drying in a half-empty can, fill any air space by dropping old golf balls into the can. A common problem known as “hatbanding” occurs when painters use a paintbrush for cutting in and a roller to apply the rest of the paint, thus producing a different texture along the ceiling and trim. To prevent hatbanding, roll the paint as close to the cut-in areas as possible.

NOW VIEWING

How to Prep Walls Before Painting

How to prepare walls before starting your next painting project.
INTERIOR PAINTINGPAINTING WALLSINTERIORWALLS

Prepping Walls for Painting

Before prepping a room for painting, protect the furniture and flooring against splattering paint or accidents.
  • A good idea is to remove furniture from the room altogether, if possible.
  • Remember to wear safety goggles and older clothes in case the paint splatters.
  • Dust and clean the walls. For most surfaces, use a towel or a vacuum cleaner.
  • When painting a bathroom or kitchen, wash the walls with a solution of approximately three teaspoons of laundry detergent to one gallon of water.
  • Scrape any cracked or flaking paint with a paint scraper. For other small imperfections on the wall such as plaster bumps, smooth them away with sandpaper. Use muscle power with a piece of sandpaper stapled to a sanding block, or use an electric sander.
  • Materials to have on hand when getting ready to paint: primer, paint-can opener, stir sticks, roller covers (close nap on a rolling cage, large nap without rolling cage), paintbrushes (one for latex paint and one for oil-based paint), paint tray, gloves, drop cloth and an extension pole for the roller.
  • A high-quality primer will help to hide any small imperfections on walls. Use a good water-based primer on new drywall. Choose an oil-based primer for walls that have heavy stains from water or smoke damage, or if the wall has paneling.
  • Before painting, protect wall sconces and wall trim with painters tape.
  • Start in the corners of the wall and up near the ceiling, “cutting in” the paint with an angle brush.
  • With a small brush, apply the paint around trim and in the corners of walls where your larger brush can’t reach.
  • A great tip is to do a “W” pattern to paint walls. Start in the corner of a wall and roll on a 3′ by 3′ “W”; then fill it in without lifting the roller. Repeat until the section is finished. This helps hide seams and any places where the roller has been lifted and put back on the wall again.
  • The best way to choose a color is to try it out first. You can never make a good decision based on looking at the color swatch in the store. Take it home and tape it to the wall to see how it works within the space and with your room’s lighting. The swatches don’t always reveal the actual color when it dries. You can test a few colors of paint on a spare piece of wood and place it against the wall.

NOW VIEWING

Choosing Paintbrushes and Rollers

Choosing the right paint brush or roller is essential to a good paint job.
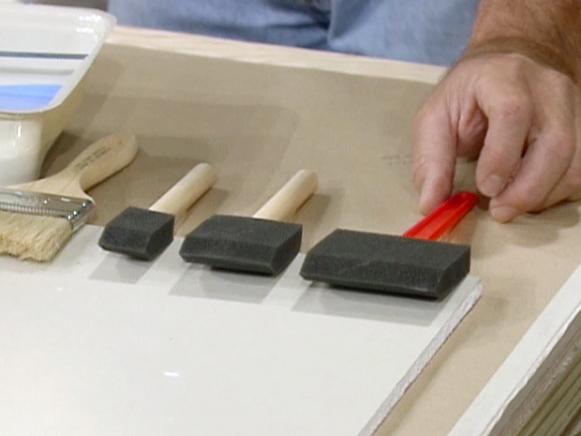
Different Sizes and Types of Paint Brushes
Foam brushes are well suited to intricate work such as painting molding or window casings. These brushes are normally good only for one use, as they’re hard to clean and easy to tear.
Manmade bristle brushes are used for acrylics and for water-based and latex paints. Before purchasing a manmade bristle brush, make sure it has a thick head of evenly distributed bristles. Cheaper brushes may have gaps in the middle of the head.
Polyester synthetic brushes are available with straight bristles or split-ended bristles. Split ends give good coverage so fewer strokes are needed to paint a surface. These brushes are used with latex paints.
Natural-bristle brushes are made with animal hair and used mainly with oil-based paints. Latex and water-based paints will dry out the bristles.
When used with latex paint, foam rollers give a finish similar to that produced by a paint sprayer. Foam rollers also come in the shape of a wheel, permitting the user to get into corners more easily.

NOW VIEWING

The Best Paint for Your Money

Painting project on your to-do list? Get tips on how to get the best paint for your money.
Higher titanium in paint means better coverage.
Paint with higher levels of titanium provides much better coverage, or “hideability.”
A can of paint can completely transform the look of a room, and it won’t cost you an arm and a leg. But what kind of paint gives you the most for your money? Per-gallon prices range from less than $8 to more than $30. Are the most expensive paints really worth the money?
One factor that affects the cost is the type of paint — alkyd oil paint or water-based latex. Although the alkyd oil-based paints are more durable and can provide a slightly smoother coat, they are more difficult to work with and to clean up, and some states restrict the areas in which alkyd paints can be used. On the other hand, the improved chemistry of today’s latex paints make them much more durable and easy to work with, and they can be cleaned up with water.
So what’s the difference between a $30 can of paint and an $8 can? First, it’s the amount of work it takes to apply the paint. The higher grades of paint contain titanium, which gives the paint more coverage so it does a better job of concealing the surface it covers. Cheaper paints contain little or no titanium, relying instead on clay. As a result, it may take three or more coats of cheap paint to equal the coverage of one coat of high-quality paint.
When applied by paintbrush, cheaper paints show brush marks and provide poor coverage. Higher-quality paints provide smooth, one-coat coverage.
Another big difference is in durability. The more expensive paints are also more washable and offer greater scrub resistance. If you try washing dirt off a cheaper paint, you’re likely to wash off some of the paint itself.
Another benefit of higher-quality paints is their reduced tendency to spatter. They contain an antispattering agent that produces less mess than inferior paints.

Paint Colors and Finishes

When choosing paint colors, pick a paint chip that appeals to you, and match it to the store’s fan deck; the colors are listed alphabetically and numerically. Next, check the light reflective value (LRV) of the paint. This is a scientific measurement of how dark or light the paint will be once it’s on your walls. As a general rule, interior paints should have an LRV of 50 percent or more. Keep in mind that the color will appear more vibrant when you apply it to the walls.
Paints come in a variety of finishes, including flat, eggshell, semigloss/satin and high gloss. Flat paint is more forgiving and hides flaws well, but it doesn’t stand up well to scrubbing. High-gloss paint is washable and easier to maintain, but it reveals surface imperfections and painting errors.

How to Choose a Wall Color

Don’t be intimidated by color — picking the right shade is easy with these professional tips.
“Color is a powerful tool,” says interior designer and author Kerrie Kelly. “It can accentuate architectural details as well as direct traffic and create flow in your home.” But how do you choose the color that’s right for a given room?
Spend some time with a color wheel to see what you like. You remember this tool from high school art class; it shows all the colors of the spectrum arranged in a circle and highlights the relationships between them. You may find yourself naturally gravitating to one side of the circle (say, cool blues and greens) or the other (warm reds and oranges). “Blues are all about tranquility and relaxation,” Kelly says. “Reds and rich earth tones are social-gathering colors. Choose according to how you’re going to use the room and the mood you want to create.”
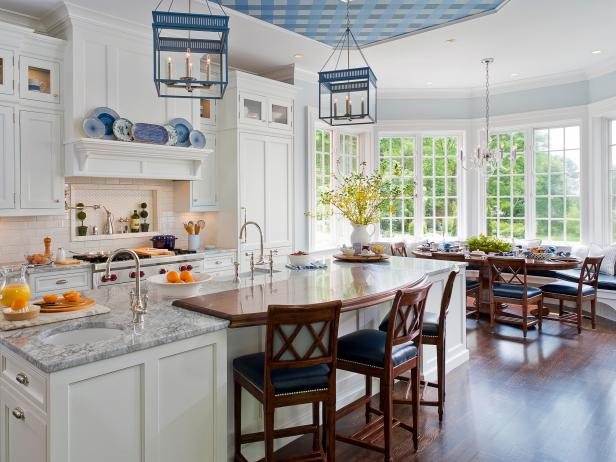
Check in with trends. Some perennial combinations never lose their charm, Kelly says, like crisp blue-and-white kitchens or calming green bedrooms. But new ideas are exciting, too:
Kitchen With Contrasting Counters and Blue Lantern Lights

Tim Lee, Tim Lee Photography

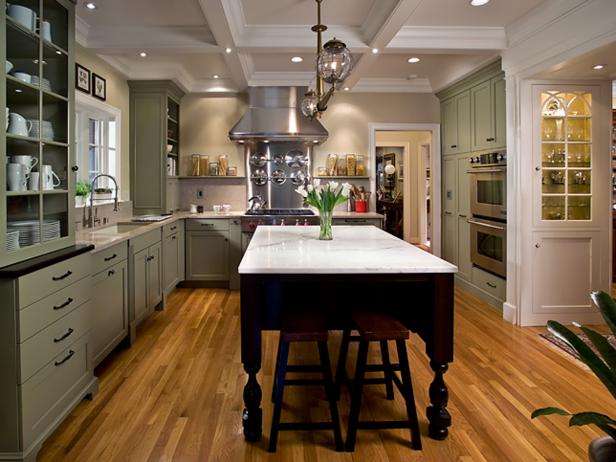
A strong movement toward natural, eco-friendly materials has put granite tones, greens, browns, and whites in the spotlight.
Green Transitional Kitchen With Marble Island

Walt Roycraft, Walt Roycraft

Whether you go neutral or bold on the wall, try accenting with metallic paints on furniture, lighting, plumbing, and accessories. “Silver, gold, bronze, copper, and pearl add elegance without being too heavy,” Kelly says. “In daylight, these colors appear neutral; in the light of evening, they impart a welcoming glow.”
If you want to make a statement, strong color palettes derived from Russian, Indian, and Latin design are on trend; blend them with traditional colors or neutrals for a thoroughly modern look.
Bedroom With Pink and Brown Patterned Wall and White Bedding

G CRAWFORD

Technology-inspired saturated colors like lime green, royal blue, apple red, sunshine yellow, and tangerine radiate energy and lend a sense of richness to a room.
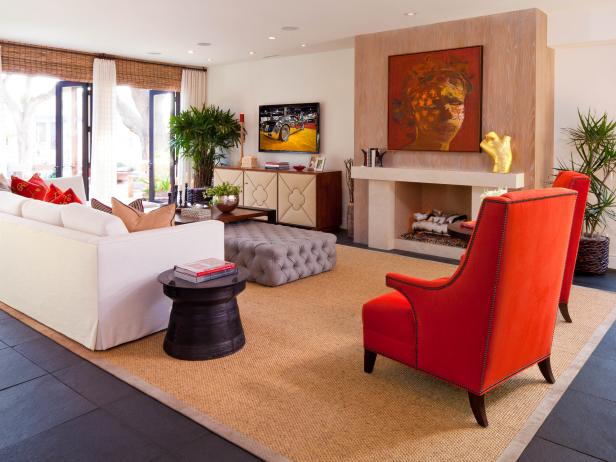
Eclectic Living Room With Eclectic Furniture

Photography provided by Donna Puzifera

Use color relationships as your guide, but be willing to experiment. Complementary colors are those that lie opposite each other on the color wheel — that means they’re visually balanced, although the high contrast may be more drama than you want in a room. “Approximately opposite colors work well, too,” Kelly says. “For example, sage green (a yellow-green) pairs beautifully with violet. Sometimes combinations are more interesting when the colors aren’t direct opposites.” You may also like the look of an analogous color scheme, which pairs colors that lie directly next to each other on the wheel; these combinations are common in nature, so we tend to find them pleasing.
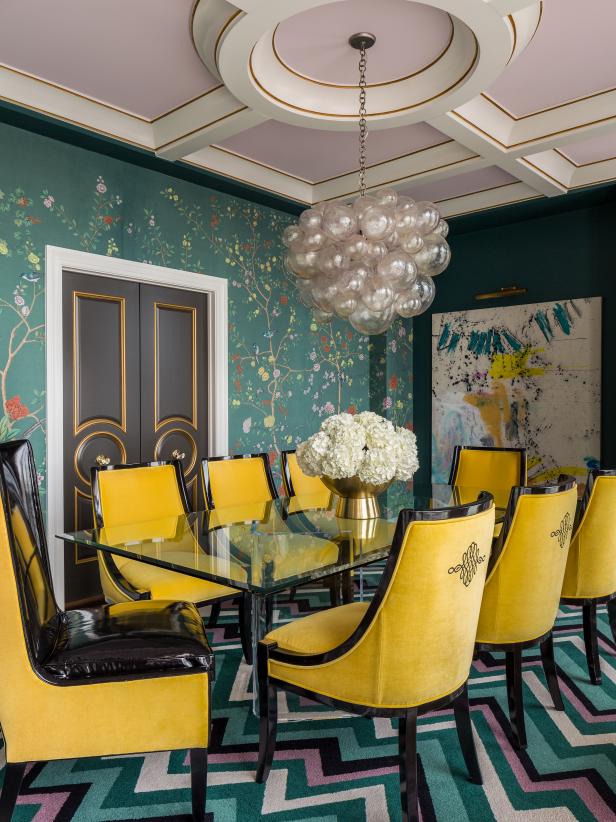
Multicolored Eclectic Dining Room With Bright Yellow Dining Chairs

Nancy Nolan

Layer tone on tone for a sophisticated effect. “A monochromatic color combination uses shades of a single color,” Kelly says, “to create an effect that’s serene and elegant. The key to success with this approach, because it’s so subtle, is to add texture and use varying scales of pattern in the materials you choose.”
Mix Up Your Lighting

Brian Patrick Flynn

Go for a test drive. Paint swatches won’t tell you everything you need to know. Buy the manufacturer’s test size in your new color and brush some on the wall (preferably where you can hide it with a picture later). “Look at your paint sample in the morning, at noon and at night,” Kelly advises, so that you can see how the color changes as the light quality changes.

Steven Holmes

Don’t hold back. If you’re looking to inject some personality into a humdrum space, don’t be afraid to slather on a big, expressive color for the walls. You can always combine that bold wall color with neutral furnishings to make a statement without creating a headache. “There’s really no reason not to experiment with paint on walls, because it doesn’t represent a big investment to do it or to change it later,” Kelly says. “Color is undoubtedly the shortest route to a dramatic setting.”

NOW VIEWING

How to Select Exterior Paint Colors for a Home

Your home’s exterior is the way you greet the world — choose a color wisely with these expert tips.
EXTERIOROUTDOOR SPACESPAINTSCOLOR
Red, White and Blue Victorian-Style Home

BEHR

If you’re painting the outside of your home, don’t be afraid to take a little time with the color decision.
“Your interior is about your personal color tastes,” says Tom Lee, Senior VP of Consumer Marketing for Behr, “but the exterior is really about durability. It’s about protecting the biggest investment you have.” It isn’t an easy decision to redo, so don’t rush it.
With that in mind, here are some tips for choosing a paint:
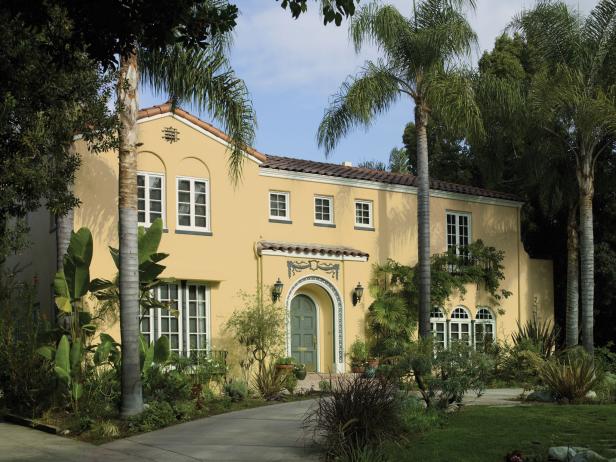
Mediterranean Home With Warm, Yellow Exterior

BEHR

  • Plan to spend a little more money. Investing in a premium paint such as Behr Marquee Exterior Paint & Primer in One is a wise choice. You don’t want to be climbing up a scaffold again anytime soon — or paying for someone else to do it — so paint needs to cover well, resist stains and stand up to weather.
  • Think about your permanent materials. If you have an existing brick or stone foundation, patio, or accents, work with their underlying tones as you’re choosing a paint shade. If you’re stuck, try pairing opposites in terms of color temperature. For example, if you have a warm red brick foundation and you want brown for your exterior paint, choose a taupe with cool gray/blue undertones instead of a peachy tan.
  • Take advantage of technology. You can usually bring in a sample of permanent materials to the paint store for computer color matching. Behr also offers an online tool called that lets you choose an initial color, recommends matching/coordinating colors, and helps you experiment with color combos on images of a home exterior so you can imagine the finished look.
  • Don’t forget the trim. If you want something other than the usual white, try your exterior color just a few shades lighter for a subtle, elegant effect.
  • Ease in with swatches. Buy test sizes of the paint colors you’re considering and paint some brush-outs on the exterior. Be sure to put some color on both the north and south sides of the house, where lighting can differ dramatically, and near any trim you’re coordinating with. Visit your paint samples at different times of day to get the best idea of how the finished product will look.
To give you a head start, here’s a cheat sheet of popular Benjamin Moore exterior colors courtesy of Andrea Magno, Benjamin Moore’s color and design expert:
  • Neutrals:
    Shaker Beige HC-45, Alexandria Beige HC-77, Pashmina AF-100
  • Grays:
    Stonington Gray HC-170, Thunder AF-685, Storm AF-700
  • Blues and Greens:
    Phillipsburg Blue HC-159, Guilford Green HC-116, Soft Fern 2144-40, Santorini Blue 1634, Wickham Gray HC-171

  • Trim:
    Navajo White 947 (also OC-95),  Frostine AF-5, Simply White OC-117
  • Front Doors:
    Lucerne AF-530, Flint AF-560, Breath of Fresh Air 806, Black Satin 2131-10, Silhouette AF-655, Super Nova 1414, Pomegranate AF-295
NOW VIEWING

Exterior Paint Selection

Painting the exterior of your house may be a job for professionals, but with some basic knowledge and motivation, doing it yourself could save you a lot of cash.
EXTERIOROUTDOOR SPACESPAINTS
Latex Paint for Home Exterior
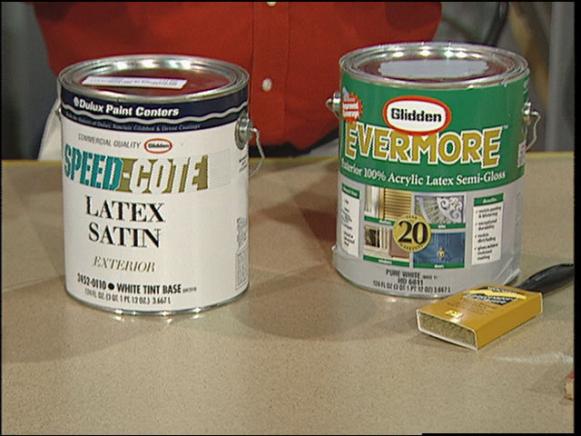
Painting the exterior of your house may seem like a job for professionals, but if you’ve got the motivation and some basic knowledge of paints, it’s a job you may want to tackle yourself. It could save you a lot of cash. Latex exterior paints have undergone improvements, and some can be as durable as oil-based.
Below are some tips on selecting exterior paint, from home-improvement specialist James Young. There are two basic types of exterior paint to choose from: oil-based and the more commonly used latex.
  • Oil-based paints are very durable and water-resistant. They result in hard finish and are often used by professional painters. Use an oil-based if the surface you are painting has already been painted with oil-based paint.
  • Stir oil-based paint frequently, as the oil in these types of paint tend to separate quickly.
  • If using oil-based paint, be sure to use a brush or roller specifically designed for use with oil-based paint.
  • Latex exterior paints have undergone many improvements, and some can be as durable as oil-based. They are also considerably easier to work with. Be sure, however, that you select an exterior latex for use on the outside of your home, not the same latex used on interior walls.
Tip: Here’s how to determine whether you have acrylic or oil-based paint on your home now. Peel off a large paint-chip. If the chip bends slightly before cracking, it’s probably latex. Oil-paint chips tend to snap easily. If this test doesn’t work for you, take a paint-chip sample to your local paint store or home center and have them test it.
  • Latex is easy to apply, dries quickly, is durable and is resistant to the effects of direct sunlight. Cleanup is easy, and just requires water.
  • Acrylic latex is the highest-quality latex paint. It will cover just about any building material including masonry and properly primed metal.
  • Important: Never put a new coat of latex over an old coat of oil-based paint. It will almost certainly peel.

Exterior Painting Preparation

When painting the exterior of a house, learn these valuable tips that can save you time by preparing properly for the project.
Decide what needs to be painted.
EXTERIOR PAINTINGEXTERIOROUTDOOR SPACESPAINTS
Painting the exterior of a house can be a demanding job. But you can save yourself a lot of work by preparing properly for the project.
First, decide how much of the exterior will be painted. Only the shutters or trim may need to be painted rather than the entire house. Next, determine the colors and the types of paint you want to use. Many companies now provide recommended color combinations with their sample books to show you what colors look good together.
If you’re having a hard time making up your mind, purchase a quart of each of the colors you like, and use the paint to create larger samples for easier comparison. Keep in mind the color you choose should fit in with the rest of the houses in your neighborhood.
Most likely a latex paint would be better because latex is easier to clean and lasts at least as long as oil-based paints. Whether you choose latex or oil-based paint, always purchase the best paint you can afford. Otherwise you’re likely to spend lots of time applying additional coats.
Before beginning the painting project, the surface of your house should be clean, dull and dry. Wash off any chalk, dirt and mildew. Protect landscape plants by covering them with plastic.
After cleaning the house, scrape off any peeling or cracked paint, then sand and prime the area. When you’ve finished priming, begin painting the trim. Semigloss paint works well on trim.
The brush used is almost as important as the paint itself. With latex paints, use a brush made of a nylon/polyester blend. Use a natural-bristle brush with oil-based paints. For maximum control, hold the brush so that it balances on your hand at the point where the handle meets the brush. Place your fingertips on the metal ferrule, and use your wrist to guide the brush. The paint will flow more smoothly from the brush.
Pay attention to the temperature. For best results, paint on days with low humidity, when the temperature is between 75 and 85 degrees Fahrenheit. Follow the shade so that your fresh paint isn’t exposed to direct sunlight; otherwise, heat blisters may develop.
Be careful to keep a “wet edge” by overlapping painting areas over the areas you finished most recently. Don’t paint into a drying paint film: the film could buckle.
The best way to paint shutters is to remove them and spray them away from the house. If you must paint them on the house, use an angled sash brush. When choosing a color for shutters, keep in mind that dark colors absorb more heat and can cause vinyl shutters to warp.
Apply an oil-based primer coat to metal doors before you begin painting. This step is especially important if the door is exposed to weather. Allow the primer to dry for 24 to 48 hours, next apply two coats of exterior paint.
http://heverspainting.com/wp-content/uploads/2021/04/hevers-fine-touch-painting-logo-1.png 0 0 Nhu6DRew2@mGC9 http://heverspainting.com/wp-content/uploads/2021/04/hevers-fine-touch-painting-logo-1.png Nhu6DRew2@mGC92021-06-04 16:42:022021-06-04 16:49:46The Top 10 Ways to Paint Like a Pro

KITCHEN CABINET PAINTING

June 4, 2021/0 Comments/in Uncategorized /by Nhu6DRew2@mGC9

Kitchen Cabinet Painting

Hevers Painting has painted hundreds of cabinets to consistently rave reviews.  We are told regularly that our kitchen cabinet painting exceeded expectations and has transformed the kitchen – quickly, easily, and at a fraction of the cost of replacing cabinets.  Meticulous preparation steps ensure paint adhesion while a standardized surface protection and dust containment system result in a kitchen as clean as when we arrived. 

Our experienced and dedicated craftsmen deliver highly durable beautiful finishes using non-toxic coatings.  This craftsmanship is combined with a dedication to exceptional customer service.  The following are some highlights of the Hevers Painting process.

Specify the Appearance you want

  • Select any color, or match to whatever you’d like such as tile or counter
  • Any sheen level 
  • Smooth spray finish, or
  • Brushed “hand crafted” appearance
  • glazing or decorative finishes to accent or distress surfaces
  • faux wood graining that actually looks like real wood 
  • New Hardware if desired, for a completely new look
  • Even doors and drawer fronts can be replaced

Beautiful Appearance

  • Paint that looks like it was personally applied, not like a film of plastic
  • Surfaces that are so smooth, they invite to be touched
  • Seamless joints
  • Eased edges and corners
  • Sharp crisp lines at non-painted surfaces 

Confidence that you will love the way it looks – for a long time to come: 

  • Samples of the actual color and sheen are provided to view in your kitchen  for approval prior to proceeding with work.
  • No disappointment due to color variation from what was seen in a cabinet showroom.
  • Paints are “color-fast” meaning the color stays true and does not yellow, fade, or darken as occurs with most cabinet paints.

Healthy & Safe

  • Hevers Painting is at the forefront of researching, testing, and implementing high performing non-toxic, environmentally friendly products
  • Waterborne primers, paints, and protective clear coats serve as the basis for the Hevers Painting cabinet painting system
  • All of the coating products we utilize are non-toxic, very low VOC, and can be safely applied in an inhabited house or building 
  • No toxic solvent or lacquer based products are used, as are typically used for cabinet painting

Exceptional Durability 

  • Hevers Painting applies advanced technology waterborne polyurethane resin paints and protective clear coatings that are not only safe but perform extraordinarily well.
  • High resistance to scuffs and abrasion 
  • Extremely washable
  • Excellent water resistance
  • Standardized preparation procedures to ensure a solid paint foundation
  • Strong adhesion to wood and other coatings to prevent chipping or flaking

Dust Free Process   

  • No mess of demolition
  • Cabinet box openings are fully sealed to eliminate the need for removal of contents
  • Filtered venting
  • HEPA vacuums are connected to sanders
  • Surfaces not to be painted are completely protected, including floors, walls, and appliances

Rapid Turnaround and low impact  

  • Kitchen cabinet painting takes approximately 1 week in your home 
  • All cabinet doors and drawer fronts are removed and painted in our workshop
  • Appliances stay in place
  • If the inside of the boxes are not being finished, the contents can remain in place
  • No lengthy process of removal of the existing cabinets
  • No long waiting for cabinet demolition, delivery, and the all too common delays, while living with no kitchen.

Full Service Craftsmanship

  • Craftsmen specifically trained and experienced in cabinet preparation and painting
  • dedicated spray shop for cabinetry fine spray finishes
  • on-site spray or hand crafted brush finishes
  • Adjustment of doors and drawers upon reinstallation is included.
  • Hevers Painting partners with custom cabinet companies to provide modifications to cabinetry if desired, including new hinges, new doors and drawers, and retrofits for reconfigurations.

Cost savings vs. new cabinets  

  • Refinishing cabinets is a fraction of the cost of replacing.  Add to that significant savings from additional work required with new cabinets – demolition, installation, other trades work.
  • If a new Cabinet door and drawer style is desired, they alone can be replaced at great savings over total replacement of cabinets. Hevers Painting Painting partners with custom cabinet makers that can make new door and drawer fronts.

Any Cabinets, Any Room

The Hevers Painting cabinet painting system can be applied to any type of cabinet, including vanities, book cases, entertainment centers, and built-ins.

http://heverspainting.com/wp-content/uploads/2021/04/hevers-fine-touch-painting-logo-1.png 0 0 Nhu6DRew2@mGC9 http://heverspainting.com/wp-content/uploads/2021/04/hevers-fine-touch-painting-logo-1.png Nhu6DRew2@mGC92021-06-04 16:34:492021-06-04 16:52:22KITCHEN CABINET PAINTING

WOODWORK STAINING & REFINISHING

April 19, 2021/1 Comment/in Uncategorized /by Nhu6DRew2@mGC9

Woodwork Staining & Refinishing

Hevers Painting has proven expertise in custom woodwork staining, clear finishes, and refinishing of existing woodwork.  We deliver highly durable beautiful finishes using non-toxic waterborne stains and clear coats.  Our craftsmanship is combined with a focus on exceptional customer service.  The following are some highlights of the Hevers Painting Process.

Beautiful Appearance

  • Samples with the full finish system are approved prior to proceeding with work to ensure the client is thrilled with the appearance
  • Uniform staining that accents the wood, not cover or “muddy” it
  • Knowledge of wood types, including the grain pattern and density, directs the optimal finishing system
  • Proprietary techniques to accent the grain of the wood
  • Match colors, intensity, and patina to blend with existing finishes
  • Clear coatings that visually enhance wood, are truly clear, and do not yellow over time
  • Surfaces that are so smooth, they invite to be touched

Healthy & Safe

  • Hevers Painting is at the forefront of researching, testing, and implementing high performing non-toxic, environmentally friendly products.
  • Waterborne stains and polyurethane resin clear coatings serve as the basis for the Hevers Painting wood finishing system
  • All of the wood staining and finishing  products we utilize are non-toxic, low VOC, and can be safely applied in an inhabited house or building 
  • No toxic solvent or lacquer based products, as are commonly used for wood finishing 

Exceptional Durability 

  • Hevers Painting applies advanced technology waterborne polyurethane resin clear coatings that are not only safe but perform extraordinarily well.
  • High resistance to scuffs and abrasion 
  • Extremely washable
  • Excellent water resistance
  • Strong adhesion to wood and other coatings to prevent chipping or flaking

Full Service Craftsmanship

  • smooth spray finish
  • hand-crafted brush finish capability
  • glazing to accent or antique surfaces
  • new woodwork, refresh existing finishes, or complete surface restoration
  • Cabinetry, millwork, doors, running trim, paneling, etc.
  • Craftsmen specifically trained and experienced in wood staining and finishing

Convenience of on-site and workshop based operations

  • dedicated spray shop for cabinetry fine spray finishes
  • on-site spray or fine brush finishes
http://heverspainting.com/wp-content/uploads/2021/04/hevers-fine-touch-painting-logo-1.png 0 0 Nhu6DRew2@mGC9 http://heverspainting.com/wp-content/uploads/2021/04/hevers-fine-touch-painting-logo-1.png Nhu6DRew2@mGC92021-04-19 15:16:462021-06-04 16:53:00WOODWORK STAINING & REFINISHING

Pages

  • HOME
  • BLOG
  • CONTACT

Categories

  • Uncategorized

Archive

  • June 2021
  • April 2021

CONTACT US

PH.: (503) 312-2488
Email: info@HeversPainting.com

CCB#235495

CONTENT

  • HOME
  • BLOG
  • CONTACT

BLOG

  • How to Paint a Room
  • The Top 10 Ways to Paint Like a Pro
  • KITCHEN CABINET PAINTING
  • WOODWORK STAINING & REFINISHING

SERVICE AREAS

Serving in all Beaverton, Gresham, Hillsboro Corbett, Cornelius, Damascus, Fairview, Forest Grove, Gladstone, Happy Valley, King City, Lake Oswego, Milwaukie, Oregon City, Sherwood, Tigard, Troutdale, Tualatin, West Linn, Wilsonville, Wood Village metro areas.

© 2021 Hever's Fine Touch Painting, LLC. Developed by: BYZION
  • Twitter
  • Facebook
Scroll to top